Enabling VR 2019.31
- Launching the Package Manager Window
To develop VR experiences, you’ll need to install the VR SDK for your target OS and VR platform. The VR SDKs are installed via the Package Manager. (You can access the Package Manager Console from Visual Studio by going to Tools → Library Package Manager -->Package Manager Console)
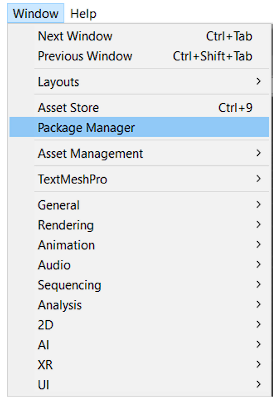
- a. Select the Package Manager from the “Window” drop down.
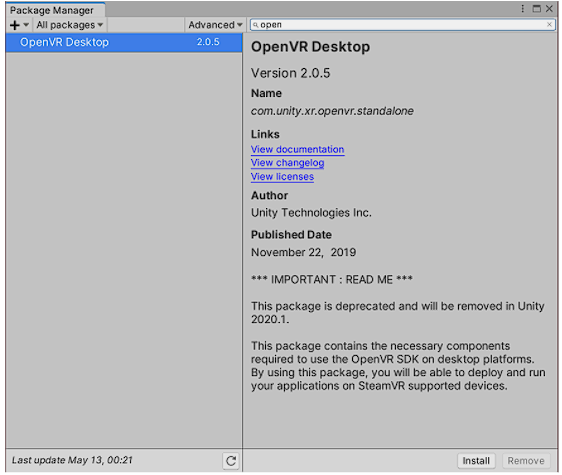
- b. Once you click the “Package Manager” all packages will appear and you need to select “Open VR Desktop”. Click to install.
- c. Other supported platforms includes:
- I. Android (Google VR Android, Oculus Android)
- II. Desktop (Oculus Desktop, OpenVr (Desktop))
- III. iOS (Google VR iOS)
Enabling VR support in project settings
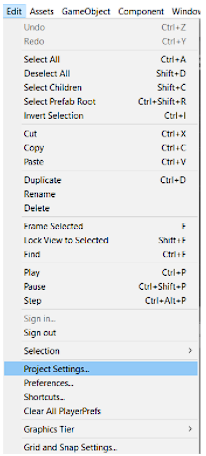
- a. Select “Project Settings” from the “Edit” drop down.
b. Once “Project Settings” open click “Player”.
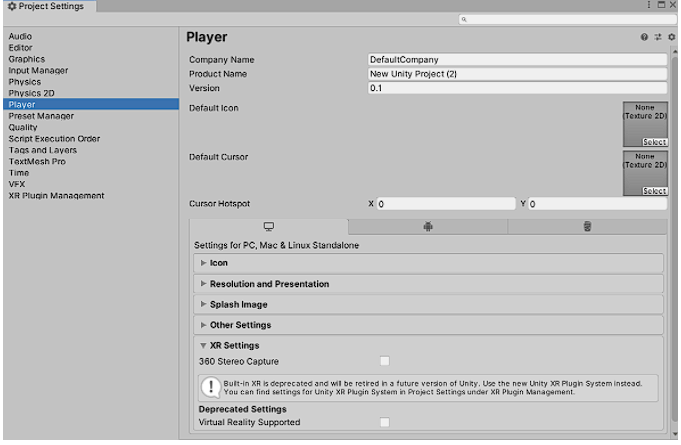
c. At the bottom part of the “Player Window” click the XR Settings to expand the section. You will see a box, then marked the “Virtual Reality Supported”.
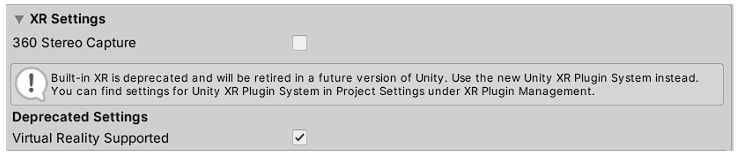
d. Once “Virtual Reality Supported” is enabled you will need to add at least one VR SDK. Click the “+” sign and select “Open VR” if it is not already added. But if once clicked and the “Open VR” is already there, no need to click the “+” sign.

e. Close the “Player Settings” window.
Conclusion